|
Win32 Window Skinning by (05 March 2002) |
Return to The Archives |
Introduction
 |
|
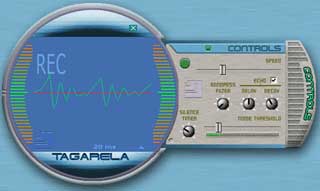
In this tutorial, I'll explain the basics of window regions and how to skin your application windows so that in the end you'll be able to easily enhance your application's visuals dramatically. At the end of this article I will present you with a skinning class that will make window skinning very easy and straightforward. If you don't know what we're talking about, take a look at Winamp, Sonic, Windows Media Player or Tagarela. All of these apps show cute irregular interfaces with nice graphics instead of the regular rectangular windows.  First, let me tell you that we're going to cover two different topics in this tutorial. Regions are one thing. Window skinning is another thing. Nevertheless, we need to use both to create those cool irregular skinned windows. So, let's go on with the subject. |
Regions
 |
|
Quoting the Win32 documentation: "In Microsoft® Windows®, a region is a rectangle, polygon, or ellipse (or a combination of two or more of these shapes) that can be filled, painted, inverted, framed, and used to perform hit testing (testing for the cursor location)." So, what do you understand from the above statement? Regions are just rectangles, polygons, or ellipses, and we can do some interesting things with it. Think of regions as shapes that we can build and manage. The Win32 API provides some functions to handle regions, enabling us to create any shape we want using just those basic primitives. With some creativity we can create very complex shapes. Let's see the arsenal available for us to use: HRGN This is just a data type, meaning "region handle". We need one for each region object we want to work with. The API will request or return a region handle when we call any region related function. Example of use:
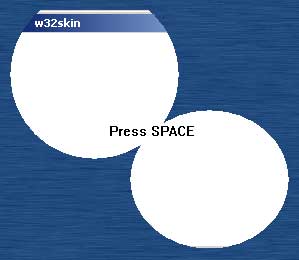
We need to DeleteObject() the region after using it. CombineRgn, CreateEllipticRgn, CreateEllipticRgnIndirect, CreatePolygonRgn, CreatePolyPolygonRgn, CreateRectRgn, CreateRectRgnIndirect, CreateRoundRectRgn, EqualRgn, ExtCreateRegion, FillRgn, FrameRgn, GetPolyFillMode, GetRegionData, GetRgnBox, InvertRgn, OffsetRgn, PaintRgn, PtInRegion, RectInRegion, SetPolyFillMode. These are the region functions provided by the Win32 API. As you can see, there are many of them available. We don't need and won't cover all these functions, just because after you figure how to create a rectangular region, you'll automatically know how to create an elliptical one, for example. After reading this article, please open the Win32 API documentation and continue reading. =) SetWindowRgn This is the function that performs the actual magic. We can attach|detach our region shape to any window. OK then, so how do we use those functions to create a cool shape? Suppose we want a region-shaped window like the figure:  Actually this is very easy if you ask me. We need the following API functions to reproduce that shape:
So let's write some real code to test it. After the initial window creation and setup, we just need to add these few lines to get the thing done:
To detach the region, we just use:
So is it all just that? Yes, it is. Really easy, isn't it? Yes, it is! You need to setup a window and build an application framework before doing that, of course. A complete example can be downloaded here: article_win32skins_regions.zip (13k) |
Skins
 |
|
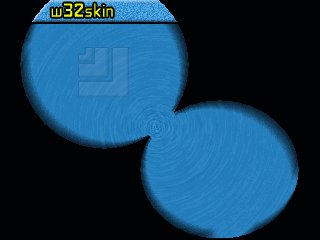
The term "skin" is actually used to describe the graphics that are used to modify the visual appearance of an application. Many modern hi-tech applications are using bitmaps to cover the regular window and give the application a much more appealing appearance. Until now, we are already able to create irregular windows, and our windows aren't just fake irregular, they are really irregular (you can see through and click through too). So what do we need now to make it yet more cool? Skins. We need one or more bitmaps and a way of putting those bitmaps over our irregular windows so that we get rid of the standard looking for ever. Actually this is quite easy too, as you'll see. To keep things simple, we will use the same window and region we built above and modify it a little so that we can have a basic skin support. The first step is the creation of a bitmap that fits exactly over the window. The example above creates a window of 320x240 pixels. So we'll just create a bitmap with 320x240 pixels too. Take a look:  Although this is not a top-notch skin, it certainly looks better than the standard looking, eh? Note that the skin bitmap itself is still rectangular, and we can't do anything about that. But it doesn't matter, as the window region will automatically clip the skin for us. We will just blit the skin bitmap to the window, and the region setup will take care of the dirty work. So the actual steps to acomplish our objective are as follows: 1 - Load the bitmap; 2 - Create a device context for the skin and select the bitmap into it; 3 - Put a switch to toggle between normal and skinned modes; 4 - Hide the caption bar and lock window resizing when entering skinned mode; 5 - Show up the caption bar and unlock window resizing when leaving skinned mode; 6 - Blit the skin into to the window in response to a WM_PAINT message when in skinned mode; 7 - Handle WM_LBUTTON message so that the user can drag the window from any point when in skinned mode. Sounds easy? It is. Let's do it step-by-step then: 1 - Load the bitmap:
As you can see, that is just standard code, nothing fancy. Of course we could load any bitmap format we wanted, like JPG, PNG, TGA, etc. But this is not the point of this tutorial, so we're keeping things really simple here. 2 - Create a device context for the skin and select the bitmap into it:
A note here is that I personally prefer to keep the HDC allocated all the time, as it is faster than recreating it and selecting the bitmap every time we need to blit to the screen. We just can't forget to release these objects before shutting the application down. 3 - Put a switch to toggle between normal and skinned modes:
We will see the RegionMe() and UnregionMe() in a minute. The above fragment is placed inside the main window procedure, responding to a WM_KEYDOWN message. What we do here is toggle a switch (bRegioned) on|off and then calling the specific function that will setup the correct window mode. 4 - Hide the caption bar and lock window resizing when entering skinned mode:
OK, now things got a little more advanced. But if you read carefully the above code, you'll see that it is really simple. It does some different things, though. First, it builds the already explained region for the window, and attach it. However, this time as the app starts with a caption and a border, we need to offset the region a little to compensate for that used space. Then, we use a little trick to hide the caption bar and lock window resizing. Finally, we force a WM_PAINT message with InvalidateRect() and SetWindowPos(). As we know, our window procedure will blit the skin to the window in response to a WM_PAINT message. We will get on that later. 5 - Show up the caption bar and unlock window resizing when leaving skinned mode:
OK, the above code is the switch back to the normal window mode. You see a SetWindowRgn() with NULL for the region handle, then the WS_CAPTION|WS_SIZEBOX being put back to the window, and an enforcement for a window repainting. 6 - Blit the skin into to the window in response to a WM_PAINT message when in skinned mode:
This fragment starts with the common BeginPaint() call. Then we call SkinMe() - the function that will blit the skin to the window. After that there is a TextOut() just to tell the user to press SPACE to switch modes. Note that the SkinMe() is called only when we're in the skinned mode (bRegioned). The actual SkinMe() function is like this:
Actually pretty simple, isn't it? But what you wanted then? We have done all the needed things to prepare the app for a nice blit. The device context is ready, the window device context was passed by the WM_PAINT, so we just need to blit the skin and we're done. 7 - Handle WM_LBUTTON message so that the user can drag the window from any point when in skinned mode:
This is a little trick to fool windows making it think that the user is actually clicking the caption bar. So the window will be dragged if the user clicks anywhere on it. Note that the trick is done only when the app is in the skinned mode. Allright, now we know how to do nice irregular skinned windows. But we have to setup an application and write all that common stuff to initialize and bring the app up and running. Grab the complete example here: article_win32skins_skinregion.zip (52k) |
Advanced Regions
 |
So what, did you think we're done??? Definitely not. You don't want to be limited to just a few rectangles and ellipses to make the shape of your application windows, do you? I am sure you want to create some dramatic shapes, with highly intrincate curves and holes. So what can we do to enhance our windows shapes? The answer is that we'll have to write our own external utility that will scan bitmaps for us and generate a pixel-perfect transparent region file of any complexity we want. With this utility at hands, we just need to load the generated file and attach to the window. No more fiddling with region coordinates, rectangles and ellipses. Sounds good? But it is, dude. Take a look at this fragment:
If you really read this code at all, you will find that it first create a rectangular region of the same size as the bitmap passed as a parameter. Then it scans pixel-by-pixel through the whole bitmap and, whenever it finds a pixel of the same color as the specified, it excludes that pixel from the region. At the end of the scan, the function has a perfect region set to the bitmap shape. At one other place, we just save the scanned region to a file, without any special processing. I won't go deeper at the utility, first because this text is going too extended and second because there is really no need for that, I suppose at this point that you got the point already. The central point of the utility is described above. So, let's accelerate, just get the RegionCreator right here: article_win32skins_regioncreator.zip (19k) RegionCreator was made as a console utility, so you will have to spawn a DOS box and call it: regioncreator < bitmap.bmp > < r > < g > < b > bitmap.bmp: the bitmap to be scanned r,g,b : the transparent color (in decimal, eg: 255 255 255) |
Loading Advanced Regions
 |
|
If you're going to use the RegionCreator utility you just downloaded, you'll need to load the advanced region files from somewhere. I am making some assumptions on this tutorial, and one is that I'm assuming you'll put the region file in the resource and retrieve from there when needed. Well, loading from an external file is just easier, so we're lucky. =) To retrieve the region file, you just need this piece of code:
After this little step, you have the region with the rgnSkin handle. So all you need to do is continue as explained before, attaching the region to the window and so on. Do not forget to delete the region after you finish using it, though. Use a DeleteObject(rgnSkin) to do the job. |
Encapsulated Enhanced Irregular Skin Class
 |
|
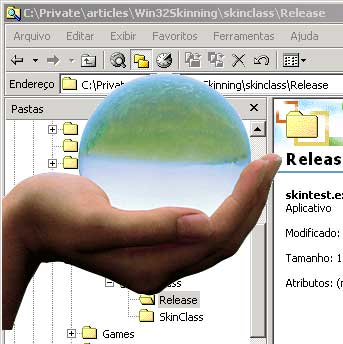
Now that we have all the code needed to make a cool skinned application, why not to go just a last step further and make a class to encapsulate the skin initialization, loading and blitting? Doing that, we can easily skin many windows without having to handle lots of device contexts, bitmap handles, and toggles. Our code will be much more clean and easy to manage. So I did that already for you. Just download the completed CSkin class with a sample here: article_win32skins_skinclass.zip (65k) The CSkin class is all automated, will load the enhanced regions from resource, and will do the skinning work without any intervention, so you don't have to do anything besides initialization (and the initialization is done with just one or two lines at maximum). The class goes yet a little step further, doing windowing subclassing, but I'll not explain this topic on this article. Subclassing is a topic by itself, so for now, I'll let it alone and schedule a new article. =) You can download all of the code from this article here: article_win32skins_code.zip (149k) Be good. Cheers, Vander Nunes http://www.virtware.net |
Additional Comments and Notes
 |
|
27 October 2002 -
This is an update to the CSkin class source-code, included on the "Win32 Window Skin" article. Download: skinclass_fixes1.zip (67k) These updates are all suggested by people who read the article on flipcode, saw some things that I didn't see at the time I wrote the article, and sent their suggestions to me. I feel happy with these contributions. Thanks to: for their suggestions and improvements. Below are the original messages these people sent, in cronological order. Elliot Kim Vander, Excellent tutorial! One of the clearest I have seen on this subject. I have found a couple of bugs though for which I have the fix. First, when you unhook the skin in the skin class destructor, the window has already been destroyed. Therefore, the SetWindowRgn and SetWindowLong calls fail in the UnHook method. To remedy this, I added a Destroy method to the skin class. Just call the Destroy method prior to destroying the window. The Destroy method contains everything that was in the original skin class destructor method. Also, I initialized m_bHooked to false and m_OldWndProc to NULL. This prevents the Hook method from unnecessarily UnHooking the first time through. Cheers, Elliot Peter Waller Hi Vander, I saw your article on flipcode.com regarding Window Skinning.. and wanted to offer an additional tip (which you may add as an amendment to your article if you please). When regions are complex they become slow, you'll notice this when dragging the window around the desktop.. even on a high end pc they appear somewhat jerky. So it is best to not "over do" the non-rectangular thing! anyway, thats not what I'm writing to you about.. I recently coded an interface for a demo-scene chipdisc which adopts the same technique. Find a screenshot + download here: http://www.pouet.net/prod.php?which=5213 Anyway, Windows 2000/XP has a function called "SetLayeredWindowAttributes" which allows you to set the opacity or transparency of a layered window. Although this is available in the Platform SDK, we need to import it manually so our executable will run on Win9x machines ( else export will fail ). Some Source:
That takes care of our importing, now we have to check to see if the user is running 2000/XP:
So all we need to do now when we setup our skinning:
g_ColourKey being the part we wish to make transparent, eg. 0xff00ff Thats all there is to it, which makes it much much smoother under 2000/XP! Anyway, thought I'd share that with you.. I'd be thrilled if you amended your article with it.. since a lot of people do use 2000/XP and can enjoy a more pleasant non-rectangular gui!! Cheerio, Peter Waller. aka sulph / rebels. Another response from Peter: Vander, Thanks for your email, good to hear from you! Nice to hear you're updating the article.. although it is already very good! Anyway, main reason for reply, in skinclass.zip, skintest.exe doesn't exit properly after you close the window, the process continues to run.. after checking your source, I found it only exits properly when you press escape!! most people use alt-f4 when theres no visible exit button? I dunno.. thought I'd pass that comment on.. its only minor fix:
Ignore me if I'm being picky ;) Looking forward to seeing the update. Regards, Peter. Vlad S. (Lothix) Hi there! Wonderful tutorial, thank you for writing it up! I have one suggestion though. Your message handling loop
Can be better written as
drops cpu utilization from 99% (deal loop =/) to 0%. - lothix Darrol Wlash I run XP and the skins do not line up with the region. The Advanced region woks great. Thank you for putting this together. The problem is with the skin blitting. If you change the following
to:
In XP it doesn't clip due to the removal of the title bar. I am not sure why this is. I will continue to look into it. Darroll Mark Mikulec Hi Vander, Let me start off by saying you've presented a very well written, easy to understand tutorial on skinning and regions. I'll definitely be using it! Just wanted to let you know, there'a minor bug in your final sample, the one with the Orb and hand project.. upon window destruction, the application process is not completely destroyed. It's gone from the task manager, but in the process list it still sitting there. (This is Windows 2000) Sounds like an orphaned device context, handle or something. Just a heads up. Regards, Mark |
|
|