In this tutorial, I'll explain how to model a simple space ship using 3DS Max 4.0.
Many people who've seen my work have requested a tutorial of this kind.
Another tutorial on creating the actual texture may come in the future.
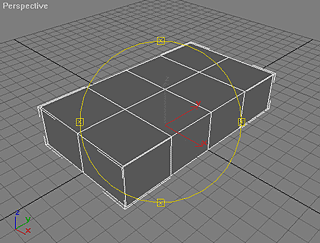
01
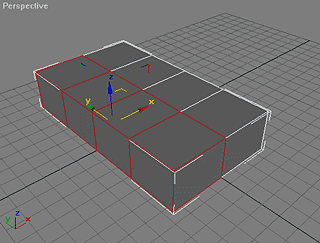
02
|
|
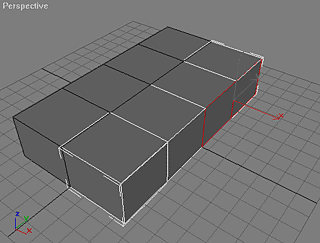
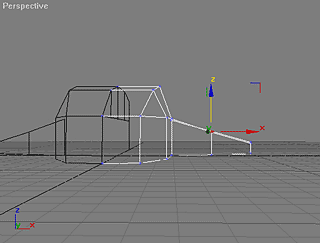
Convert it to an Editable Mesh, then delete half of the mesh by selecting the faces and pressing DELETE.
|
|
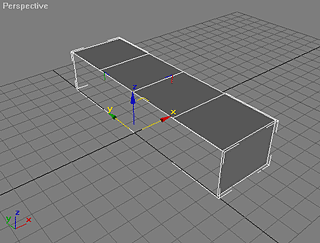
03
|
|
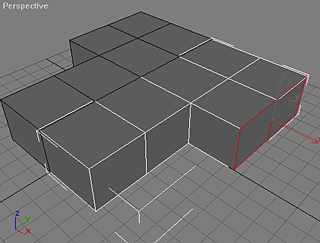
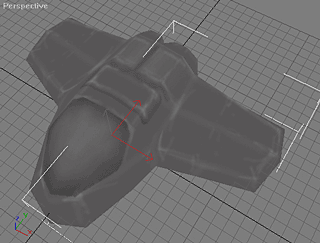
Here's how it should look.
|
|
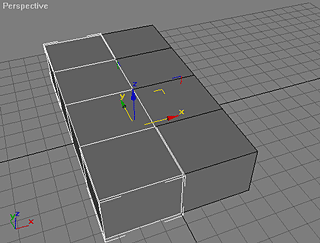
04
|
|
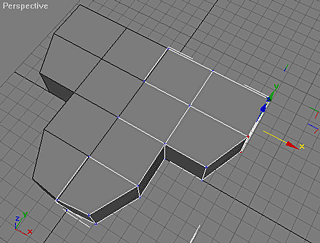
Make an instance copy of the half mesh (Hint 01), so again there's a whole box mesh. From now on, all of the actions on one half will influence the other. So generally speaking, we avoid doing twice the work. A spaceship shape is usually symmetrical, but even if it not, its better to use this method for creating the basic shape; then adjusting all asymmetrical parts as needed.
|
|
04-a
(Hint 01)
|
05
|
|
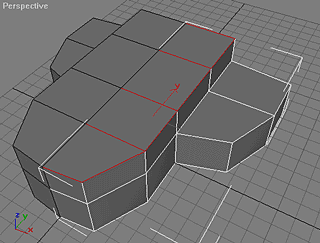
Select faces as shown in the image...
|
|
06
|
|
... and extrude them like this. (Hint02) As you can see, the same action is performed on both parts. Any modifications of parts will influence each other until they are made "Unique" or "Collapsed"
|
|
06-a
(Hint 02)
|
07
|
|
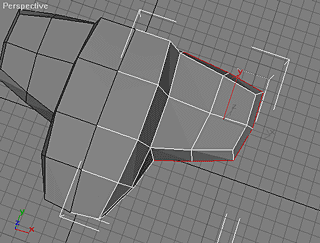
Now adjust the shape from the top view until it resembles the one in the image.
That's an important concept, the top view shape should be done first. Its better not to make any shape changes from different views until the basic top view shape looks the way you planned.
|
|
08
|
|
Next, create a hull by extruding the top faces as shown in the image.
|
|
09
|
|
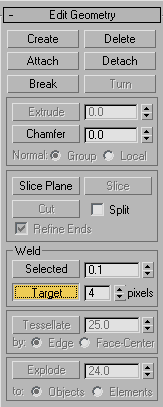
Use Vertex "Target Welding" (Hint 03) to adjust the shape. Just select the top vertices one by one and weld them to neighbor vertices by pressing "Target Weld" button. This is the most useful technique for Editable mesh modeling.
|
|
09-a
(Hint 03)
|
10
|
|
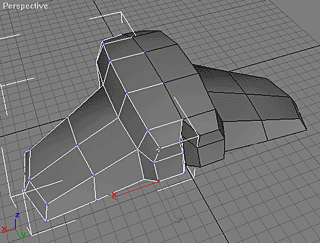
By pushing vertices around you can make the shape appear smoother and more natural.
Remember not to make any changes from the side views until you're done with the basic top view shape.
|
|
11
|
|
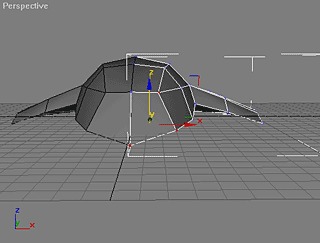
Extrude the wing's side faces to make them longer
|
|
12
|
|
And again, mold the mesh into a more natural shape by moving vertices around from the top view. Always try to move multiple selections of vertices. I wouldn't recommend moving "Faces" or "Edges."
|
|
13
|
|
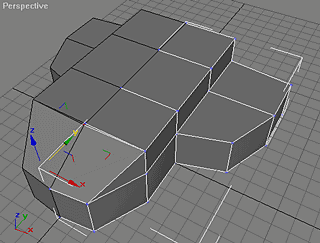
Now its time to work from the other views as well. Be very careful when making changes, and make sure to examine the model by rotating it in the Perspective view after any mesh changes. Its also very important to note that any changes from isometric views show the model differently than how it is; so be sure to examine it carefully. The more you examine it, the more you'll be able to determine incorrect shapes that need to be fixed, as well as new and interesting things that can be done to make it better.
|
|
14
|
|
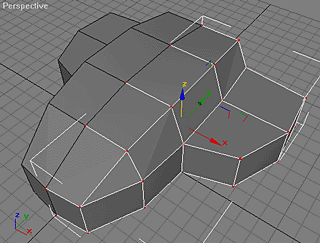
Now make the bottom part of the wing wider by selecting it and scaling or beveling. The less perpendicular faces you have the better. They aren't natural. This will help to prevent the model from having a "Boxy" look.
|
|
15
|
|
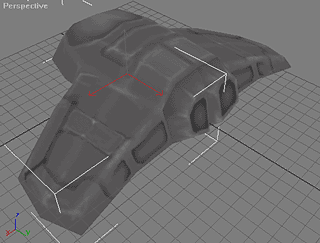
Here's how it should look.
|
|
16
|
|
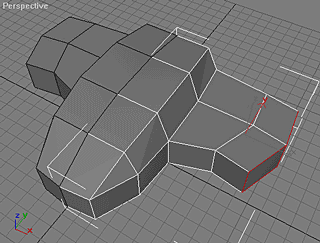
Now adjust the hull from the front view to form a basic cockpit shape. Also, make the wings look more natural. Wings perpendicular to the hull are not natural, so keep to the theory of avoiding perpendicular shapes. Even slightly turning parts can change the general look of a model.
|
|
17
|
|
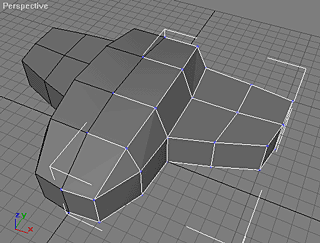
Now delete the right part, we don't need it anymore.
The most difficult part of model creation is texturing. Not texture painting, but unwrapping the model coordinates to be able to paint it. Of course painting the texture itself is still a very important part that defines the look (and even shape) of a model.
Anyway, there are 2 basic methods of texturing:
-Texturing it with existing textures using Unwrap UVW.
-Flattening (unwrapping) the model and then painting it from scratch.
The first one is quicker but you don't always get what you want. It requires a lot of practice to achieve good results.
The second is much harder but you always get the things you want on any part of the model. Its useful for "important" models, not neccesarily for the background scenery models.
|
|
18
|
|
So here is how the second method works:
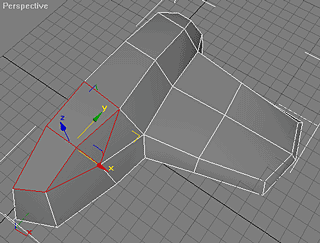
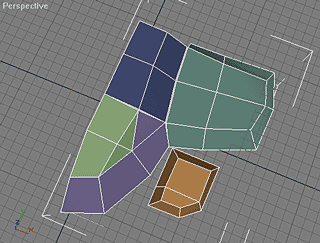
The first step is to divide the model into basic parts.
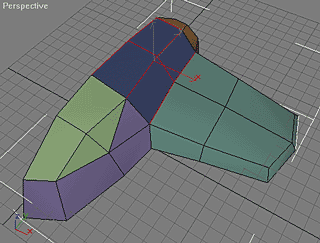
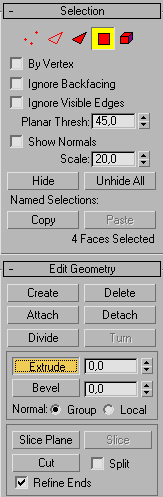
Next, select multiple faces and detach them. They are colored differently in the viewport if you detach them as objects. It helps to visually separate the parts. As you're detaching the model, try to think logically about how you will be flattening it. You can't see the full object at all times, so the goal is to make all of the surfaces flattened and visible from one view.
After the model is divided into separate parts they should be attached again to make the whole mesh.
|
|
19
|
|
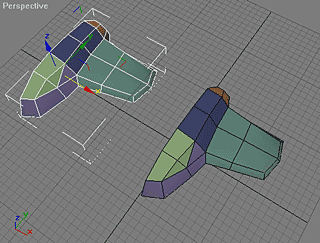
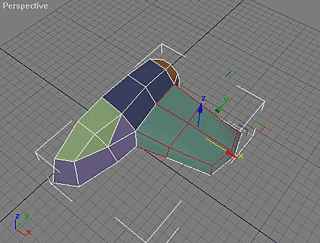
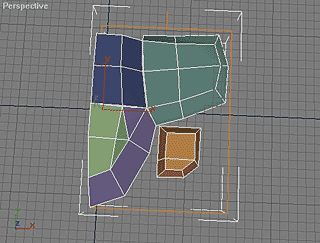
Now make a copy of the mesh and hide it.
Make sure its not an instance, but a copy of the model!
|
|
20
|
|
Now the goal is to flatten the model parts we previously detached by working in editable mesh only. Why is that so important and what is the copy for? This will simply help to flatten the model, create mapping coordinates, and then return the model to its original shape. Lets find out how it works...
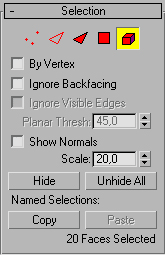
Your goal is to select separate parts by the Mesh selection (Hint04) and move/rotate them to flatten the model. Well this is a very simple model, just for learning, so there's almost nothing to move or rotate. But this will be very hard when flattening models with complex mesh geometry (like several wings, additional engines, etc.) Its always better to practice on something simple.
|
|
20-a
(Hint 04)
|
21
|
|
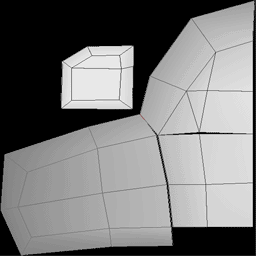
So all we did was move the nozzle and flatten the mesh by pushing vertices to the sides.
|
|
22
|
|
Here's how it should look. Don't try to fit parts to a regular square, its ok to have a rectangle like this.
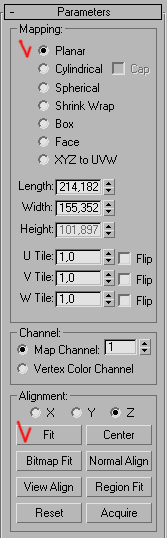
Apply Planar UVW mapping and FIT it. (Hint05)
Now you can create an Unwrap grid that will be used for painting.
|
|
22-a
(Hint 05)
|
23
|
|
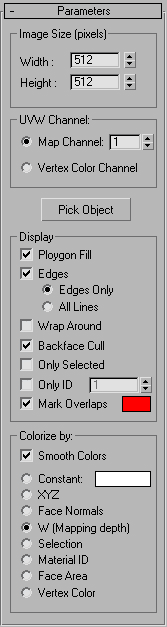
The best way to obtain an unwrapped image of a model is to use free Texporter plug-in. You can make a wireframe image so its easier to see the polygon schematics and paint over them. Here's what the Texporter Rollout looks like (Hint06).
Pick Object and save this image from the virtual frame buffer. Then open it in Photoshop.
To install Texporter copy the supplied .DLU to plugins directory. And accesss it from Utilities section in 3D Max. You can download Texporter3 here (194k), or download the appropriate version here.
|
|
23-a
(Hint 06)
|
24
|
|
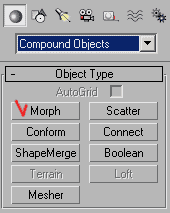
Unhide the part that's not flattened, and morph the unwrapped model with the MORPH modifier (Hint07) by selecting the newly unhidden part as a [Target]. Now it looks how its supposed to.
|
|
24-a
(Hint 07)
|
25
|
|
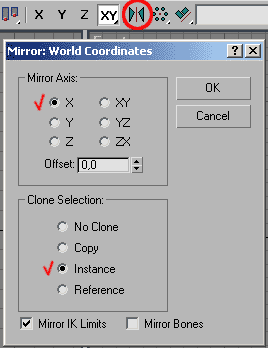
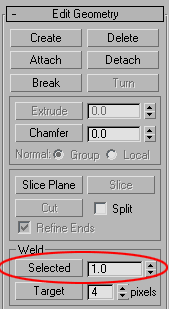
Just make a mirror copy of the resulting mesh again, and attach them both into one mesh. Additionally, the vertices should be welded by the WELD SELECTED (Hint 08) operation from editable mesh. Now the whole mesh should be welded again, without open edges or holes.
And then just start painting within Photoshop and update the texture in 3DS Max every time you save a copy from Photoshop. Examine the model every time the texture is updated, to find what could be fixed or improved. Rotating and examining the model helps to get a better feel of the model texture just like during the modeling process.
|
|
25-a
(Hint 08)
|
26
|
|
Proceed with improving the texture step by step by adding basic shapes to show technical parts of a ship. I myself prefer to make a grey draft texture first, and only then coloring it.
|
|
27
|
|
Well here is the finished simple space ship tutorial model with a draft texture.
|
|
Download the complete tutorial package here (993k), including the
MAX/3DS mesh, and the JPG/PSD texture.
About The Author: Max Shelekhov is currently working full-time as a professional video game artist in Eastern Europe. In addition, he's done artwork for a number of
independent projects, including an upcoming game by Gradient Studios. You can see some
of his work here.
If you have questions or comments about this article, please post them in our
GAMING ART forum.
|