Introduction To Windows Programming
by (12 December 1998)


Return to The Archives
Introduction


Believe it or not, many of the coders that I've talked to over the years have avoided Windows programming -- not because they think dos is superior or even because they dislike Windows; but simply because they're afraid of Windows code and the learning curve. They take a few peeks at sample code and see lots of scary words and constants that lead them to believe they'll have to dedicate enormous amounts of time to switch from dos to windows -- which they don't really want to do. So what's the story? Windows programming is not that difficult once you understand a few key concepts. Sure the code can be intimidating when you first take a look at it, but it makes sense (in a twisted way :) when you understand what's going on and it can actually be quite elegant. This document sets aside things like MFC, OWL, and other such facilitators. We'll be looking at bare Win32 code and examining how it works and why. Be forewarned: This is part of a series that eventually specializes in graphic/game programming techniques -- not general application software. At first the difference may not be visible, but throughout the series I'll purposefully omit certain concepts and practices in the name of speed or neccesity for what we're working on. Also, the sample code included with this tutorial was tested and compiled using Microsoft's excellent Visual C++ 6.0 compiler. Just a personal preference and one of the most common. You shouldn't have too many problems compiling the code with other compilers (hopefully). The code provided for this tutorial is in C for clarity, but the documents to come will most likely be in C++.


Event-Driven Programming


Most likely you have heard the term 'event-driven' before, but what does that have to do with Windows programming? Much. If you're used to dos coding (or similar system code), you're probably accustomed to having programs execute lines of code, one by one, in order from start to finish via function calls and such until the program is done or accomplishes some task. This is not how Windows programming works. Windows programming is typically based on 'events'. What kind of events? An event can be anything such as a mouse click or a button click on a window. So if a user clicks a button, how does our program know to execute the code for a button click? For our purposes, imagine a sort of omnipresent sentinel that sits around and waits for these events then converts them into 'messages' that our program can deal with. Each window is sent messages based on events and such, which are then accordingly processed. So if a button is clicked, the parent window is sent a message (via a function call) that tells it what has happened. How does a window receive a message? Each window has a 'window procedure' that handles all of the messages sent to it. We'll see more on that and how to react to messages in a bit. First we need to create a window.


Application Initialization


The sample application for this source code is a very simple program that basically just pops up a window and provides feedback as to what messages were processed when certain events occur. You should download and run the program to see how it works and what this tutorial is working towards showing you. Before we can actually create a window, there are a few steps that we must take, but even before that -- let's take a quick look at WinMain.


 int PASCAL WinMain(HINSTANCE hInstance, HINSTANCE hPrev, LPSTR lpCmdLine, int Cmd) {

MSG msg;

... // other initialization code; while(GetMessage(&msg, NULL, 0, 0)) { TranslateMessage(&msg); DispatchMessage (&msg); }

return msg.wParam; }


WinMain is called by the system when our program is first run. It's the starting point of our application. The first parameter is the handle to the instance of our application. The second parameter will always be NULL for our purposes. The third parameter is a string pointer to the command line. The last parameter specifies a show state (there are several values that start with "SW_" that you can look up in the help files). We will look at the other initialization code in a moment, but take a look at the while block. GetMessage gets a message from our thread's message queue and puts it into our MSG variable. The only time GetMessage returns 0 is when it receives a WM_QUIT message. You can use GetLastError to get error information if GetMessage returns an error (-1). Otherwise its return will be non-zero. The GetMessage parameters provided say that we want to retrieve any type of message available. The message is received into the msg variable which is then used by TranslateMessage to translate special keyboard messages into messages that are sent to the thread's message queue (you don't really need to worry about what this means right now). DispatchMessage then sends the message to the proper window procedure. Our window procedure is a special function that will process all of our messages. Note: there is a function called PeekMessage you can look up on your own time. Its quite useful because it returns (boolean) immediately instead of waiting around for a message like GetMessage does. It has its advantages, but I won't discuss them here. Now lets see how we go about actually creating our window.

First we need to register the window class. This would happen somewhere in the "other initialization code" section I left out of the WinMain above. Our window class can be registered via code such as:

 // Setup and register the window class;

       WNDCLASS wClass;
                wClass.style         =CS_HREDRAW|CS_VREDRAW;
                wClass.lpfnWndProc   =WindowProcedure;        // callback function;
                wClass.cbClsExtra    =0;
                wClass.cbWndExtra    =0;
                wClass.hInstance     =hInstance;
                wClass.hIcon         =LoadIcon(hInstance,IDI_APPLICATION);
                wClass.hCursor       =LoadCursor(NULL,IDC_ARROW);
                wClass.hbrBackground =(HBRUSH)(COLOR_WINDOW+3);
                wClass.lpszMenuName  =NULL;
                wClass.lpszClassName =WINDOWNAME;
 
       RegisterClass(&wClass);


The WNDCLASS structure contains window class attributes for the window we plan on creating. For a complete description and listing of all the available constants, read the help files that came with your compiler. (Word to the wise: Throughout your days of Windows coding, you will most likely be dealing with MANY constants, api calls, and things of this nature. Be sure to familiarize yourself with the help files. They're extremely useful when you're learning the way things work and as a general reference.) I'll briefly try to explain what each member means:

style Specifies the class style. CS_HREDRAW and CS_VREDRAW mean that our window will redraw whenever our window is moved or resized horizontally or vertically.
lpfnWndProc Specifies our window's 'window procedure', which handles the messages that are sent to it. We'll see more on that later.
cbClsExtra Amount of extra space (in bytes) to allocate for the class structure.
cbWndExtra Amount of extra space (in bytes) to allocate for the window structure.
hInstance Instance handle.
hIcon Handle to an icon (use a resource handle)
hCursor Handle to a cursor (use a resource handle)
hbrBackground Handle to a brush to use as the class background. There are several "COLOR_" HBRUSH values you can look up in the help files.
lpszMenuName Pointer to a string that holds the menu name (from a resource). We aren't using a menu for this example program.
lpszClassName Pointer to a string that specifies our class name. WINDOWNAME is #defined elsewhere in the program as "Simple Sample Application".


After setting up our WNDCLASS structure, we register our class by using RegisterClass which registers our window class so we can use CreateWindow to actually create our window such as the following code does.


 // Create the window and store the handle;

       hWnd = CreateWindow(WINDOWNAME,                    // class name;
                           WINDOWNAME,                    // window name;
                           WS_OVERLAPPEDWINDOW,           // window style;
                           CW_USEDEFAULT, CW_USEDEFAULT,  // starting position (x,y);
                           320, 240,                      // width and height;
                           NULL,                          // parent handle;
                           NULL,                          // menu handle;
                           hInstance,                     // instance handle;
                           NULL);                         // other parameters;
	

// Check if window creation failed; otherwise show and update; if(hWnd==NULL) return FALSE; else { ShowWindow (hWnd, Cmd); UpdateWindow(hWnd);

}


The parameters should be fairly self explanatory (again, all the values for things such as 'window style' can be located in the help files), but I'll quickly explain them. The first parameter is the class name that we registered earlier. The second parameter is the window name -- which will show up in our window caption. The next parameter is the window style, which in our case is WS_OVERLAPPEDWINDOW. There are many combinations of styles you can use, but you'll have to look up all the values in the help file because there are too many for me to list here. The next two parameters specify the starting position of the window (horizontally and vertically). CW_USEDEFAULT just means to use the default position. The next two parameters specify the window's width and height respectively. The next parameter is the handle to a parent window. If our window was a child or owned window, we'd set this parameter to the parent window handle. Next up is a menu handle, but we're not using a menu so it's NULL. The next-to-last parameter is our instance handle and the last parameter is a pointer to other data to be sent to the window. After creating the window, you should usually check if the returned handle is valid then call ShowWindow and UpdateWindow which will set our window's show state and then tell it to repaint itself.

Now we would have a functioning window on our screen as shown below:


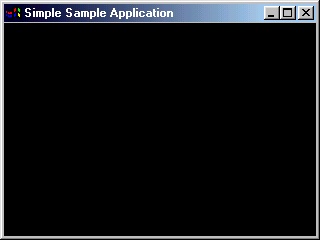
But don't think we're done just yet. We still need to write the window procedure which is how we make our seemingly useless and pointless window respond to some events.


Processing Messages


As I mentioned before, we need to look at how the window procedure for our function works. Here is an example:


 LRESULT CALLBACK WindowProcedure(HWND hWnd, UINT msg, WPARAM wParam, LPARAM lParam) {

switch(msg) {

case WM_MOVE:

MessageBox(hWnd, "WM_MOVE: The Window Moved", WINDOWNAME, MB_OK); return 0;

case WM_DESTROY:

MessageBox(hWnd, "WM_DESTROY: Exiting Application", "Goodbye!", MB_OK); PostQuitMessage(0); return 0; }

return DefWindowProc(hWnd, msg, wParam, lParam); }


The code above is a little strange and doesn't do very much, but hopefully it will illustrate my point. The convention is to use a large switch/case setup to handle messages that we want to process explicitly -- then return DefWindowProc to take care of any messages that we don't. The "WM_" values above are 'window messages' that are simply constants that refer to events. For example as I mentioned earlier, a "WM_QUIT" message would return 0 to GetMessage (thus ending our message loop and exiting). If we wanted to process the WM_QUIT message ourselves, we'd add to the switch above, "case WM_QUIT:" and the corresponding code. In the example program I only added two messages to process, the "WM_MOVE" message which occurs after the window has been moved, and the "WM_DESTROY" which occurs when a window is being destroyed. You can add as many other window messages as you'd like such as "WM_CHAR" and "WM_SIZE" that all occur based on different events. Hopefully you should be seeing how things are coming together now. Events (like moving our window with the mouse) occur which are then translated (in the message loop) into messages. The messages are sent to our window and we do specific things based on what message it is. Any messages we don't neccesarily want to do anything with, the DefWindowProc handles. Wonderful, yes?

Run the sample program to get an idea as to how it works -- then try adding some of your own message processing code to the window procedure to see how and when different messages occur. You should find many "WM_" messages along with descriptions in your help files. Try finding some that you want to experiment with and plug them in. Also note that the parameters to our window procedure: WPARAM and LPARAM can hold different data. For some messages such as "WM_SIZE" -- which occurs after a window's size has changed, parameters are passed along as well. The low-order word of LPARAM is the new width and the high-order word of LPARAM is the new height. You can get them using "width = LOWORD(lParam)" and "height = HIWORD(lParam)". Many messages carry along various parameters that should be mentioned along with the message descriptions in the help files.


Closing


Well, I hope you learned something today, but obviously don't stop here. The whole point of this tutorial is to get you started so you can figure things out for yourself and gain experience on your own. One of the most important things I'd like to emphasize is that I've repeated "look at the help files" numerous times throughout this document. If you're new to Windows programming, without them you'll probably have a very difficult time with many of the Windows-specific API calls, parameters, messages, and constants that you have to deal with. People buy tons of books, download terabytes of source code, flood newsgroups with questions, and all sorts of other things to try to find answers that are probably sitting right there in the help files or manuals that came with the compiler, sdk, library, etc. Try to figure things out for yourself and actually understand what's going on. We've all heard RTFM, so do it.


Downloads


  • Download the Sample Application (9k)
  • Download the Sample Application + Source Code (10k)

  •  

    Copyright 1999-2008 (C) FLIPCODE.COM and/or the original content author(s). All rights reserved.
    Please read our Terms, Conditions, and Privacy information.